CoreEngage is an Agent app that works alongside CoreInteract.
IMPORTANT: The CoreEngage App must be used popped out from Teams to remain open when navigating to other apps within Teams. To pop-out, right click on the CE app, select pop-out.
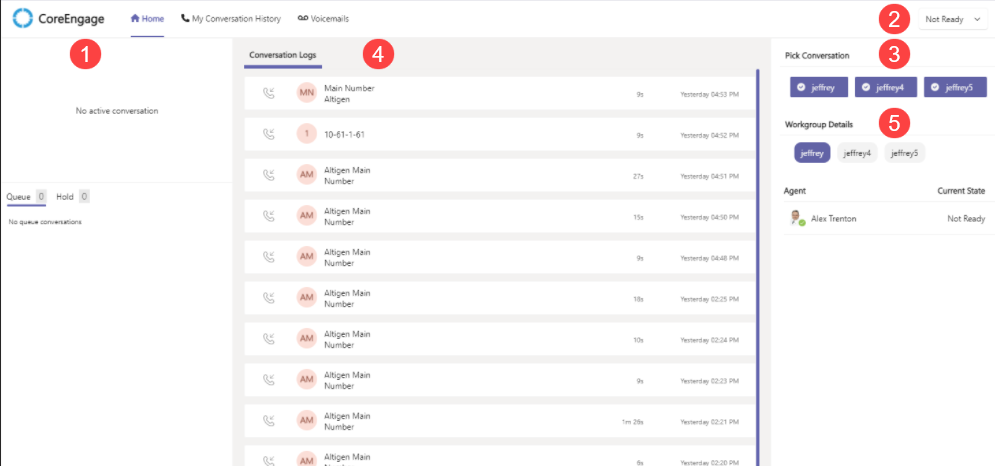
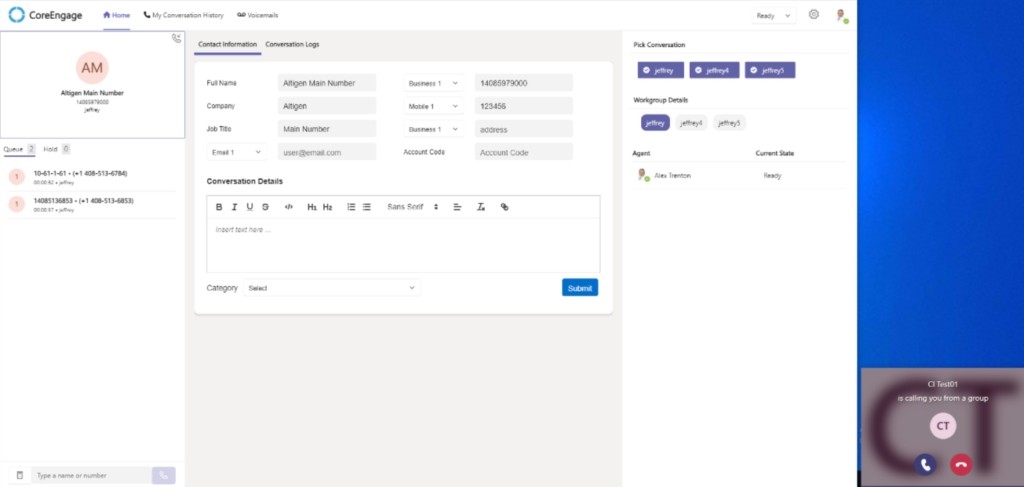
The CE home page includes:
- Conversation Window – Active conversations will show when a call is routed and answered.
- Current State – Selections include Not Ready, Ready, Busy.
- Pick Conversations – Select or De-Select Workgroups to receive calls from.
- Conversation Logs – Quick view of past calls specific to user.
- Workgroup Details – View workgroup members, their Teams status, and their CoreEngage state.
Workgroups
Users are assigned to workgroups by the Workgroup owner or administrator. Users may be assigned to one or more workgroups based on business requirements. From the homepage, users have visibility for workgroups they are assigned. Calls are distributed to workgroups based on the configuration of the workflow and their CE state.
Availability Status
CoreEngage allows users to manage readiness with the CE State drop-down selection menu (Ready, Not Ready, Busy).
NOTE: CoreEngage overrules Microsoft Teams presence. Example – if a user’s Teams presence is busy, away with a CE state is Ready the user will receive a call.
Reminder: You must pop-out CoreEngage from Teams to remain open when navigating to other apps within Teams. If not popped out and a user navigates to another app in Teams CE state will be Offline, and their Teams presence takes priority for call handling.
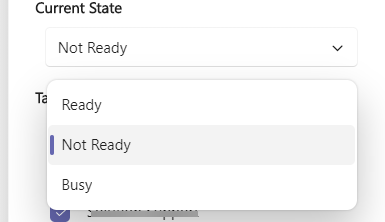
CE State Selections:
Ready – User will receive calls
Not Ready – User will not receive calls
Busy – User will not receive calls, they are either on a call or manually set to busy
Call Controls
When the agent receives a call, it will show on the left-hand side of the screen in the Active Conversation Window before presenting the Teams toast in the lower-right hand side of the screen. The agent must use the Teams toast to answer the call. They will then have the option to do the following listed from Left to Right:
- Place Call On Hold
- Blind Transfer
- Consult Transfer
- End Call
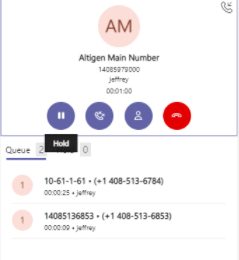
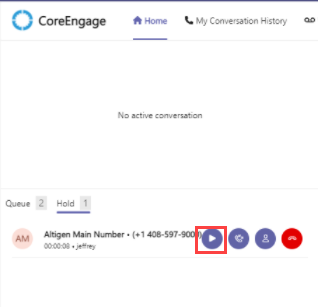
Placing A Call on Hold
To place a call on hold firstly answer the call then click on the pause button. The call will now move to the Hold section. To resume the call, click on the call and then click the play icon.
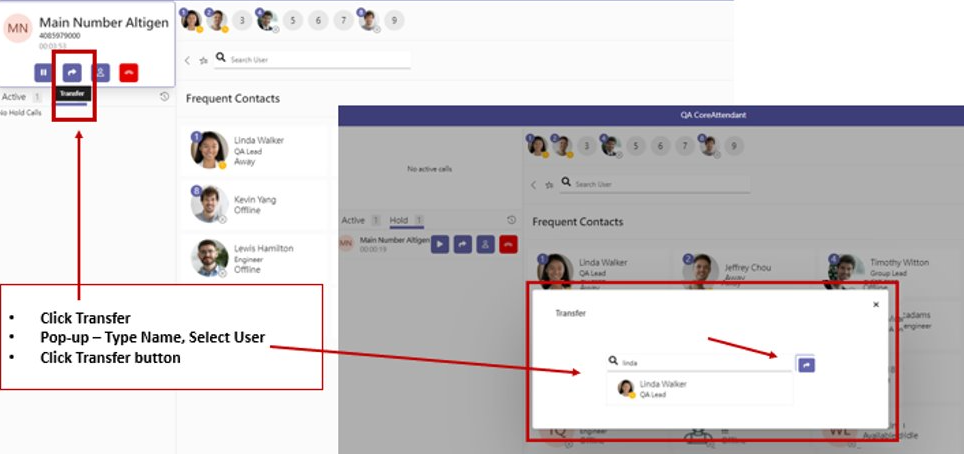
Call Transfers
To transfer a call, answer the call and click on the Arrow button, next a pop-up will appear to allow the selection of a Teams member.
For a consult transfer click on the person icon, the caller will be placed on hold and a pop-up screen will appear. Search for the Teams user that you wish to transfer to and click on the phone icon to call the user.
You will be connected to the user to consult. If the user is happy to take the call then the agent can end the call and the call will transfer to the user.
Alternatively, you can go back to the CoreEngage application and click stop consult to bring the call back and the agent to resume talking to the caller.
From the consult transfer pop-up screen, you can also blind transfer by clicking on the Transfer button.
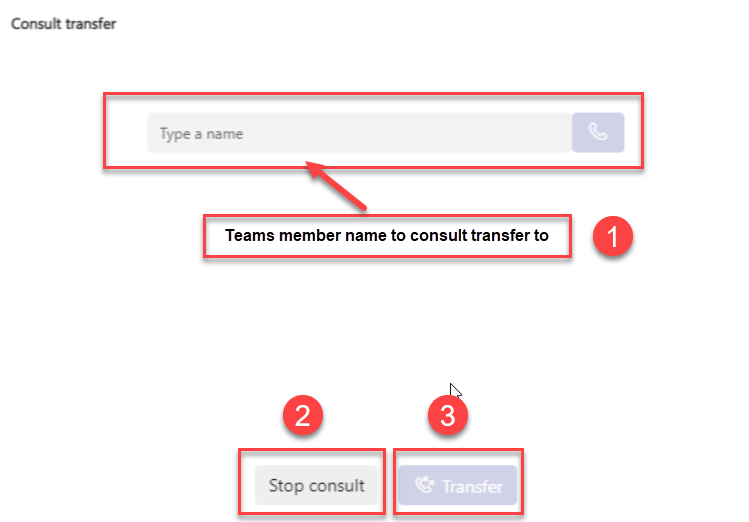
- Name – Teams member who you are sending the consult transfer to.
- Stop Consult – Brings the call back to the agent who answered the call.
- Transfer – Allows a blind transfer from the consult transfer window.
Outbound calling
Outbound calling can be enabled within CoreInteract (This will be set by Admin, see the user guide for information)
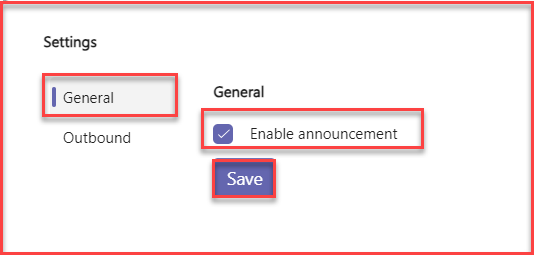
Once it is set up in CoreInteract go into CoreEngage and select the settings icon in the top right-hand of the CoreEngage home screen. This will open a pop-up menu.
Within this window, there are two options available General and Outbound. Click on Enable announcement option to enable the announcement to be played while enabling a callback queue feature.
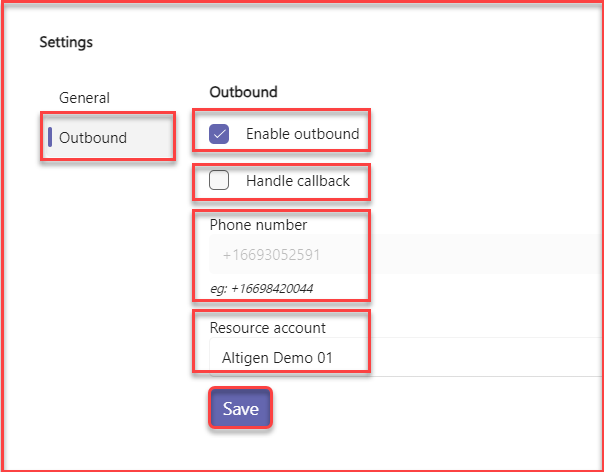
To access outbound feature, click on Enable Outbound (to handle outbound calls), enable Handle Callback (to handle callback feature), make sure the phone number is populated with the agents DID and select the Resource account is populated (make sure it matches the information given in CoreInteract by your Admin) then save.
Now, go back to the home screen and click on the icon in the bottom left for the Dial pad or type in the number and dial that way.
Taking Calls
Pick Conversations allows a user to pick which workgroups they will take conversations (calls) from by clicking on workgroups listed under Pick Conversation section. This section will only show those workgroups the user is assigned and as default, all will be selected CE is first opened. Calls will be routed only for those workgroups that are checked. *Reminder: User CE State must be set to Ready.
When a call is routed to a user, the Conversation Window (top left) will populate with the call information, with the number of the caller. A contact card becomes available if configured by your administrator. The contact card will be covered in a later section.
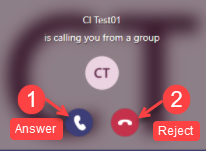
In the bottom right of the screen, the agent will also see a pop-up showing the incoming call, to answer click the phone icon button. To decline the call, press the far-right button. This will push the call to the next available agent and automatically changes the agents state to Not Ready.
Adding Information – Contact Card
To use the contact card in CoreEngage an administrator will need to configure this.
When a call comes in and accepted by the agent the contact card will open in the middle frame of CoreEngage.
When an agent receives a call and the system already holds information on the caller the contact information will be pre-filled. This can still be edited by the agent if necessary.
If the system has no prior information on the caller then the information will remain blank for the agent to fill out.
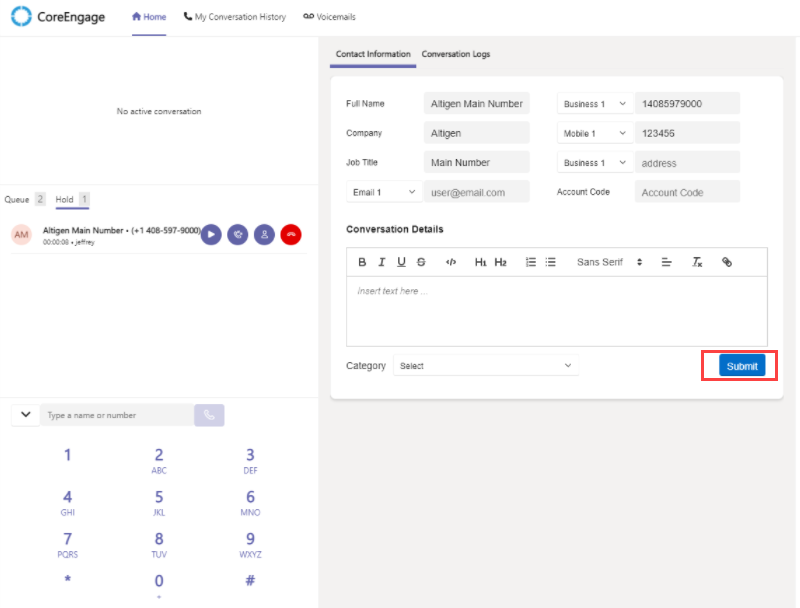
The conversation details box is used in each call to log the information from the call.
The following list shows the information that is gathered in the fields:
- Full Name
- Company
- Job Title
- Email – includes drop-down to add two additional Email addresses (Email 1, Email 2, Email 3) – Default view is Email 1
- Phone Numbers
- Business with drop-down to additional numbers (Business 1, Business 2, Business 3) – default view is Business 1
- Mobile with drop-down to add additional numbers (Mobile 1, Mobile 2, Mobile 3) – default view is Mobile 1
- Addresses – Includes drop-down to add additional addresses (Business 1, Business 2, Business 3) Default view is Address 1
- Conversation Details with Account Code Field – User will enter detailed notes and type in an account code related to the conversation. These details are saved for the agent who enters them and are not shared.
- Category – This is a selection box that will be located under the Account Code box. The selection box will be customized by the administrator with specific categories (Example: customer, Prospect, Support, Inquiry) The category would appear in the line items of each contact conversation history.
NOTE: You will need to press submit during the call to save the customer information in the contact card. Once the call is finished the contact card will close automatically. Warning! If the data is not saved by clicking the submit button before the call is ended, the data will not be saved and you cannot edit the contact card afterwards.
Ending a Call
To end the call the agent can click on the Red phone icon in CoreEngage or click the Red phone icon in the Teams window. Once the agent has ended the call, they will automatically be placed in a Ready State to accept another call.
Conversation History
Any conversations that an agent has will be logged in here for them to refer to at a later date if needed.
Voicemails
Any calls that have gone to the Workgroup voicemail will show in here, the agent has the following options:
- Listen to voicemail
- Download Voicemail
- Email the contact
- Call back the contact
- Delete voicemail
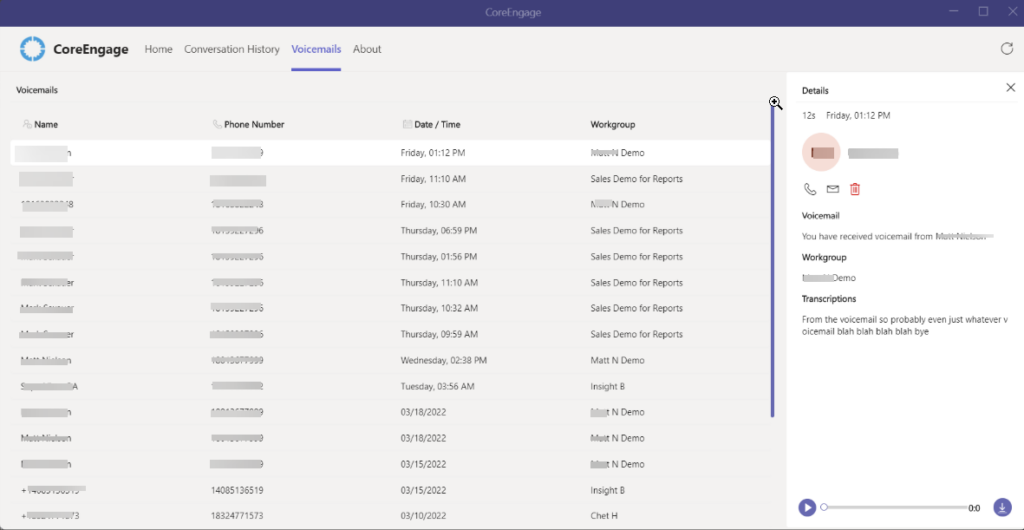
To listen to the voicemail use the play button on the bottom right of the screen, or to the right of this is the download option. If the agent downloads the voicemail it will open a new window asking where to save the .wav file.
To send the person an email reply click the envelope below the callers name, this will open an email where the agent can type up their reply.

If the agent wishes to call the person back then they just have to click the phone icon below the callers name.
To delete the voicemail click on the trash can below the callers name. Please note that this feature will not ask if you are sure, the voicemail will be deleted when clicked.
CoreEngage Connect
CoreEngage Connect is a feature available to integrate a customized screen pop from an existing CRM application (Salesforce, Dynamics SharePoint, etc.). Professional Services are required for a customized configuration. Configuration settings are managed within CoreInteract for Admin.