With the new update the following features will be included:
- Line Park / Line Park Admin
- Auto Call Answer
- Google Contacts Integration
- Call Window Duration
- Reject Anonymous Call
Now let us take a look at each feature.
Line Park
To be able to use this option it must be first set on the PBX by an Administrator. This is documented further down.
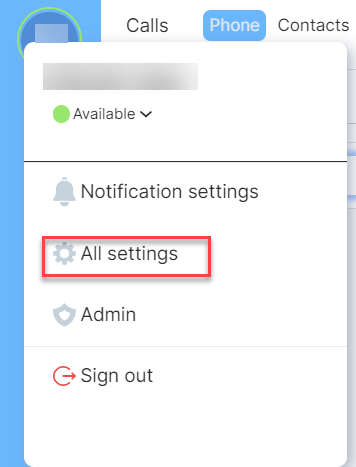
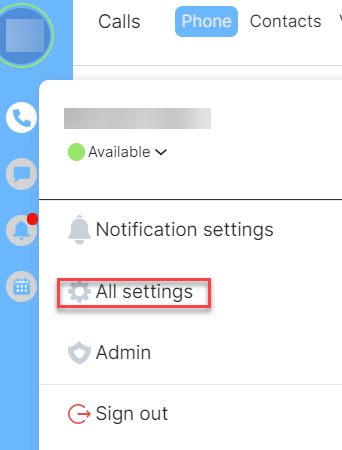
Once the setup is complete the user will need to open the settings menu by clicking their Avatar and selecting All Settings:
This will open a menu on the right of the screen, select General and scroll down to Line Park:
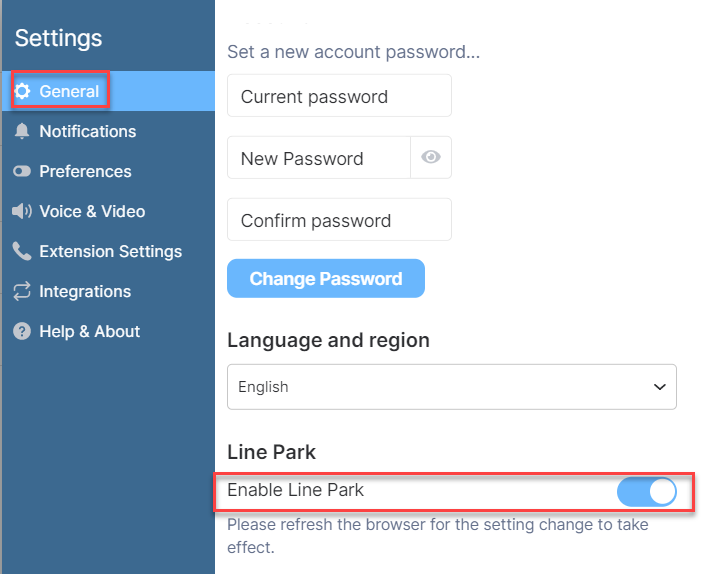
Make sure the toggle is set to the right (On)
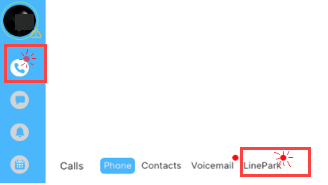
In the calls menu a new tab will appear showing Line Park.
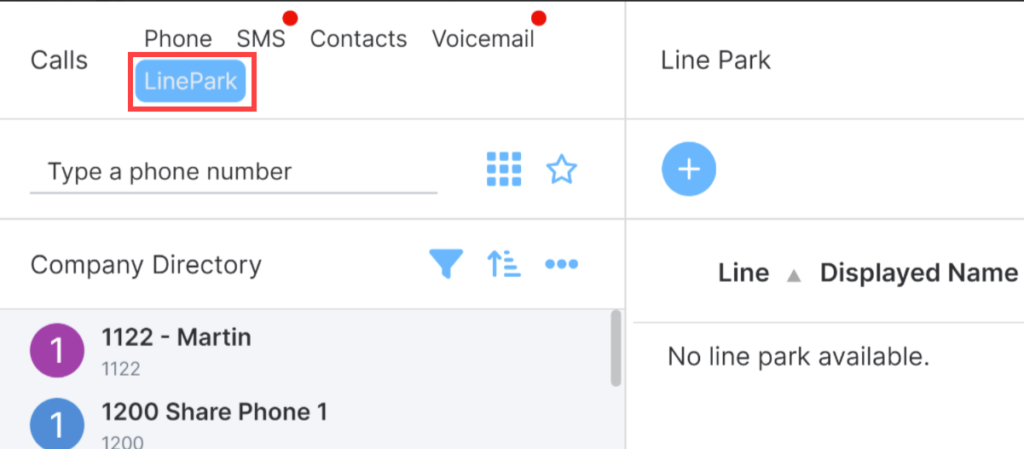
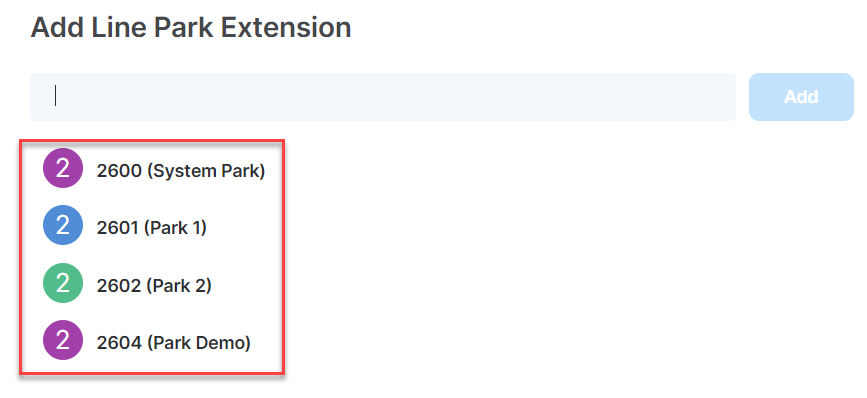
A user can click on the Add button and they will have a list of available extensions, they can click as many of these as they would like. As they are selected the numbers will populate into the bar. When happy with the selection click Add.
Now the extensions will show in the Line Park information, in here a call can be picked up or parked, a user can also delete the extension by clicking on the three dots to the right.

The circle around the slot icon will show different colors to indicate the state, If it is Green this means the slot is open and if it is Red this means a call is parked on that slot.

The Pick Up button will be enabled if there is a call parked in the slot, and the client does not have an active call.
If the client has an active call and the park slot is empty, the park button will be enabled.
A slow blinking Red dot indicates there is a call parked on the line park extension slot.
Admin
When you log into MaxCloud UC web client and if your role is also, system Administrator, Operator, and/or PBX Administrator on the portal, you will see an Admin Menu Button in the setting that can be found by clicking on your avatar.
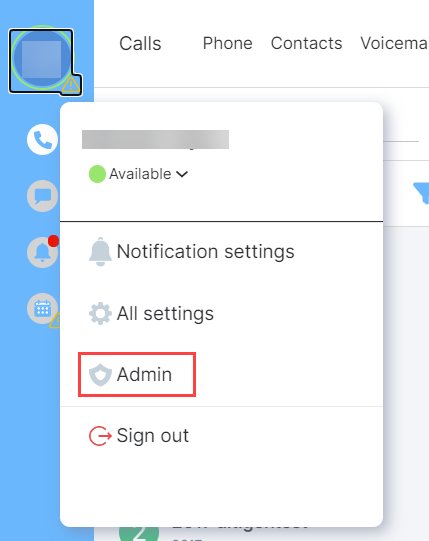
Click on Admin, this will open a pop-up window that will show the available Line Park extenstions:
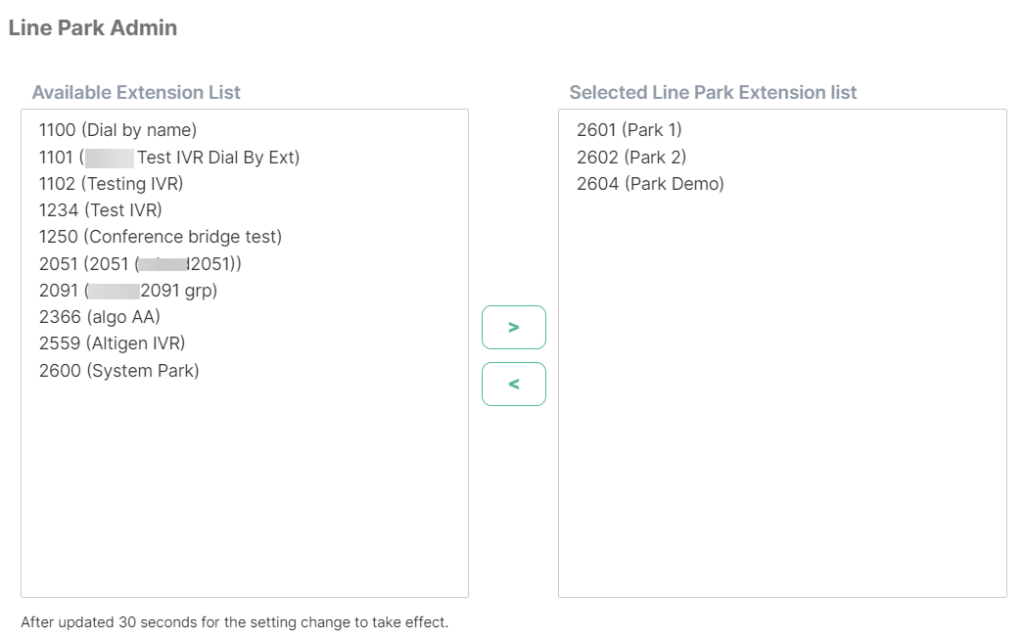
This will only show the PBX’s you have admin or operator access rights to.
Park slot Extension
An administrator will need to set the line park extensions in the PBX. To do this they should follow the same steps they use to add an extension to the PBX but point the extension to an IVR so the caller gets music or a greeting when in a parked call.
Park and Pick Up
To park a call, press the Park button on MaxCloud UC. Internally the MaxCloud UC client will just transfer the call to the park slot extension.
To pick up the parked call, press the Pickup button on MaxCloud UC. Internally the MaxCloud UC client will call *76+ park extension number and it will pick up that call.
Server and API
Provides the monitor function for the park extension. Updating subscriber with caller ID and other call info when call goes into the park slot or leave the park slot.
Auto Answer
MaxCloud UC can enable automatic answers on Extension Settings. When it is enabled, the incoming call will be automatically answered.
To activate this click on your avatar and choose all All Settings. This will open up a pop up on the right of the screen, in here click on Extension Settings. Next you should see Call Handling, select how many seconds the call should automatically answer after (up to 30 seconds) then toggle the switch to the right to activate:
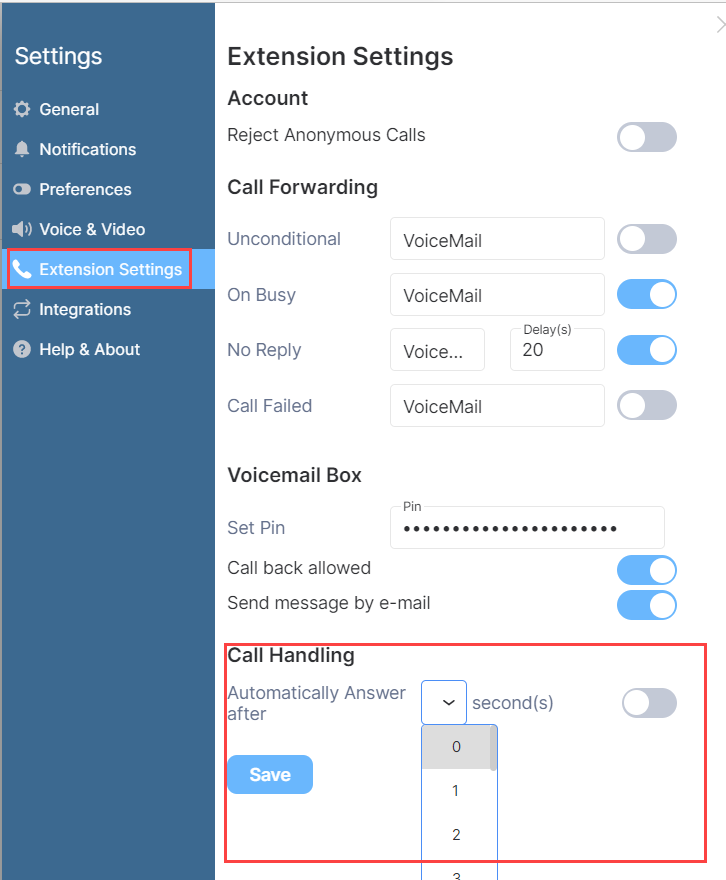
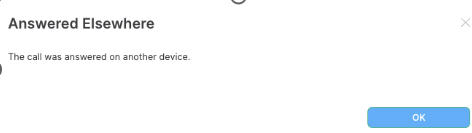
If there is already a connected call, it will not answer additional incoming calls automatically. If another MaxCloud UC Client answers the call a pop-up will show telling you that “The call was answered on another service”.
Google Contacts Integration
Google contacts can now be imported into MaxCloud UC.
To do this you will need to obtain this using Google’s authentication method.
Pre-requisites:
- A Google Cloud Project
- A Google Workspace domain with API access enabled
- A Google Account in that domain with administrator privileges
Integrate Google Contacts
To Implement:
Open the main menu, do this by clicking on your avatar and selecting All Settings:
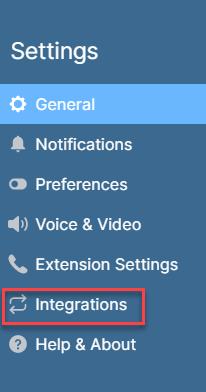
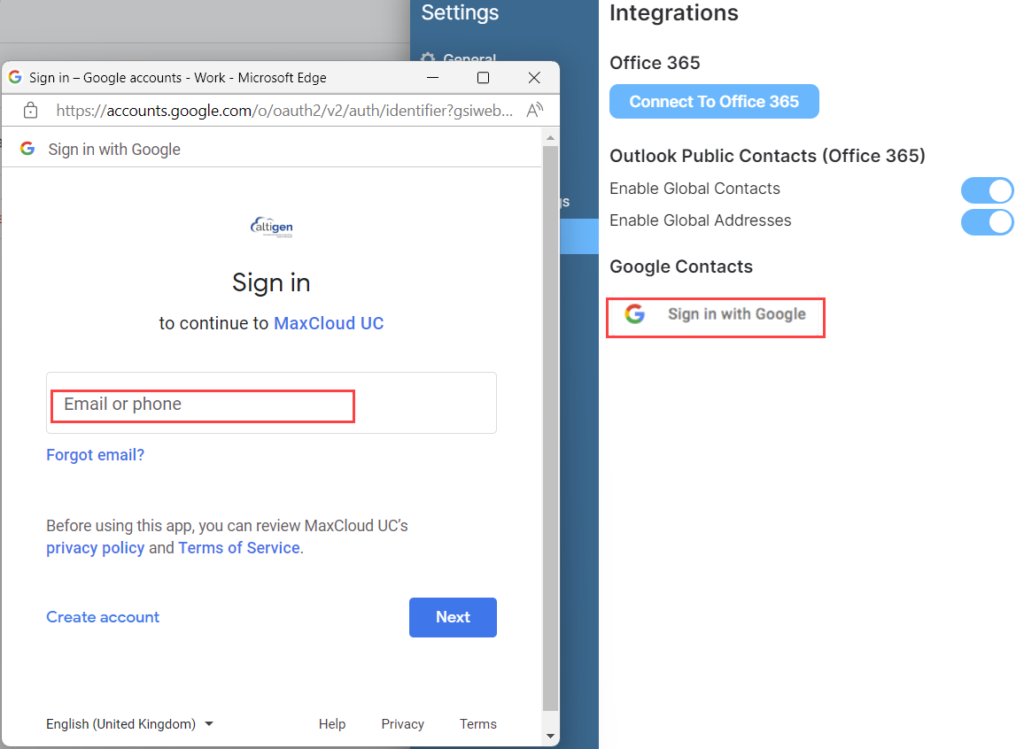
This will open a pop-up to the right of the screen. Go to Integrations:
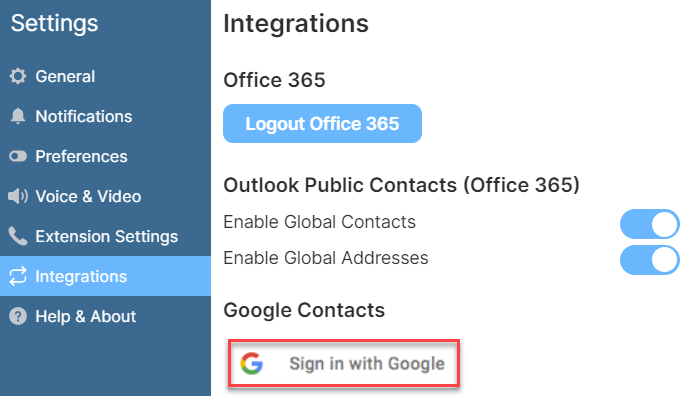
This will open the setting for integrations. Click on Sign in with Google Contacts
This opens the pop up as shown to the left, see below. Enter the details then click continue:
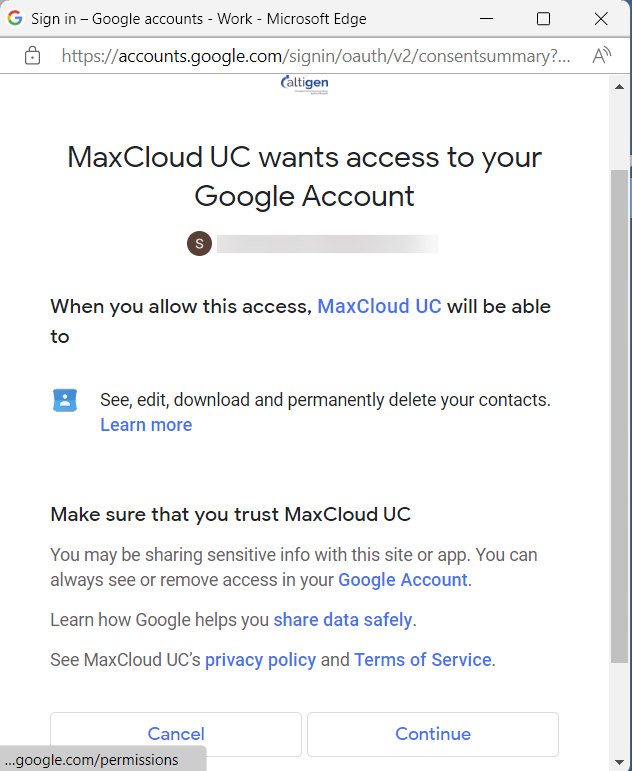
Now it will be connected, open the menu again and go to integrations then you will see the

Note: You are able to have both of these options connected together.
Show Google Contacts
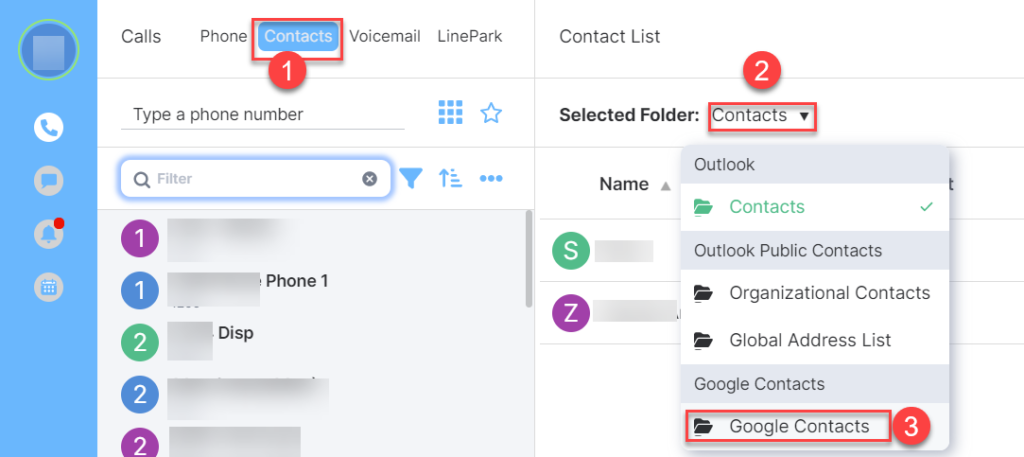
To view your Google contacts follow these steps:
- Click on Contacts
- Click Select Folder
- Click Google Contacts
Call Window Duration
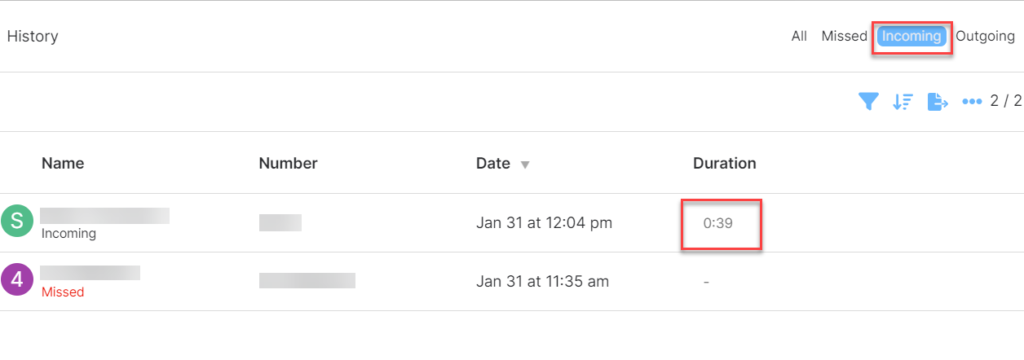
When a call is answered a timer begins this can be seen above the call information box and will also show at the end of the call:

Reject Anonymous Call
There is now a setting in the Extension settings to enable this option. To navigate to the Extension menu the user will need to click on their Avatar (top left of the screen) and choose All Settings.
This will open a window to the right of the screen, on here choose the Extension Settings, the top option will be Account – Reject Anonymous Calls. Click on the toggle and make sure it is set to the right side so it shows a blue background then click Save at the bottom of the screen.
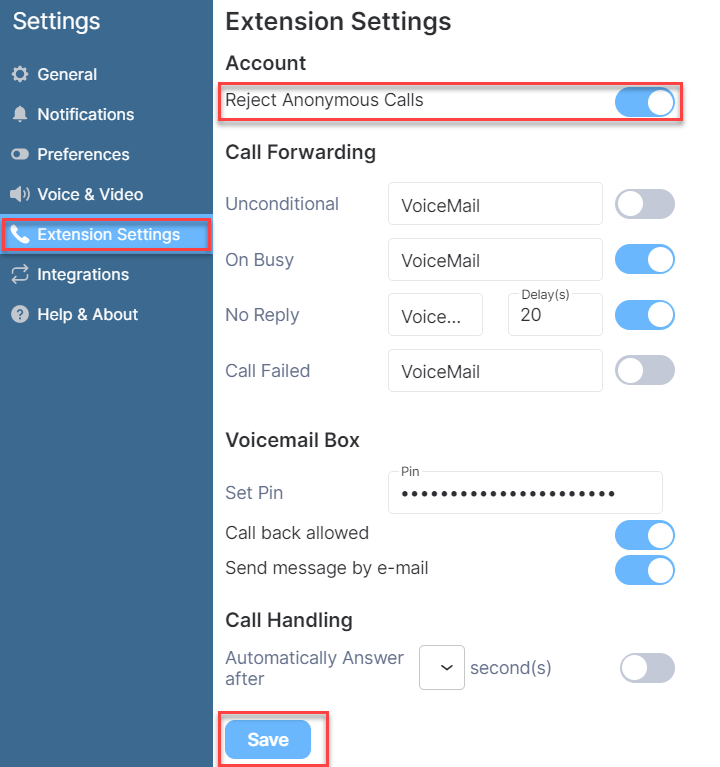
NOTE: Remember to click save before closing the menu.