Freshservice is the ticketing system used at Altigen. Using this makes it very simple for customers to report issues they are facing.
As the ticket is processed the customer can see the status and track their ticket with ease. Not only will the system update but they will also receive emails ensuring that the communication line is open and accessible.
Logging In
To log into Freshservice follow the link that has been provided and set up the account. This will be sent by email.
Once completed the account is set up and next time only the email and password will be needed to log in (As below).
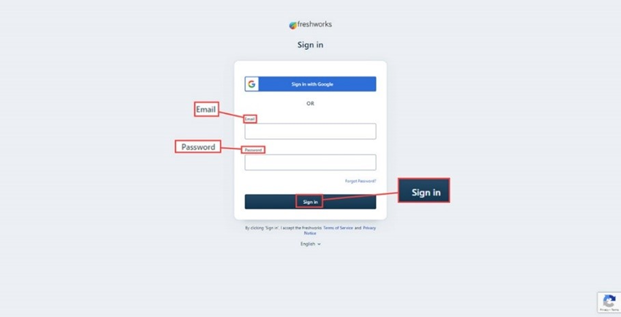
Login to freshservice using the link provided. Enter the username and password, then click Sign in:
The home screen will now show:
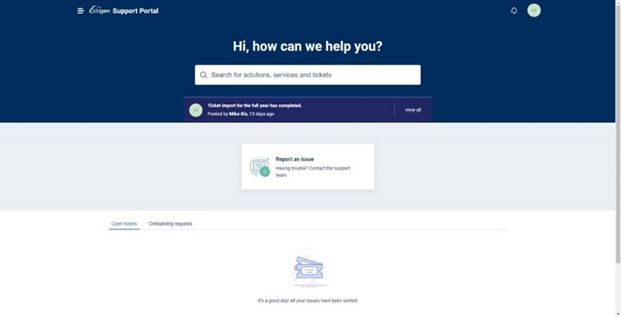
Home Screen
Within the home screen are the following icons and options:
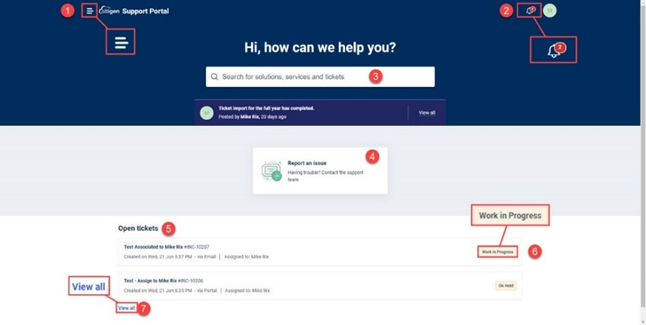
- Menu – The menu has the following options.
- Home – Click this to return to the home screen.
- Solutions – This section is a work in progress and will contain FAQ’s that may help to resolve an issue without the need to create a ticket.
- Tickets – This will give the same view as the view all on the home screen. A list view of all tickets that are open. The view can be altered using the filters.
- Service Catalog – A list of available services and ability to raise a request.
- Notifications – A number in a red circle shows if there are any unread notifications.
- Search Bar – Type in items to search for such as the ticket number.
- Report an issue – Click here to open the screen to create a new ticket.
- Open tickets – Any open tickets will show in a list below this.
- Status of ticket – This gives a quick view of the progress of a ticket.
- View all – If there are a few tickets open click here to view the full list.
Menu
This section covers the menu items in more detail.
As described above there is a menu at the top left of the screen when clicked it will show the options available:
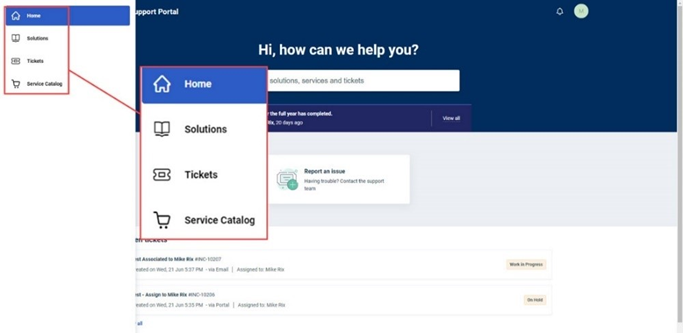
Home
The first option (Home) is used to return to the home screen view from any other screen.
Solutions
Next in the list is solutions:
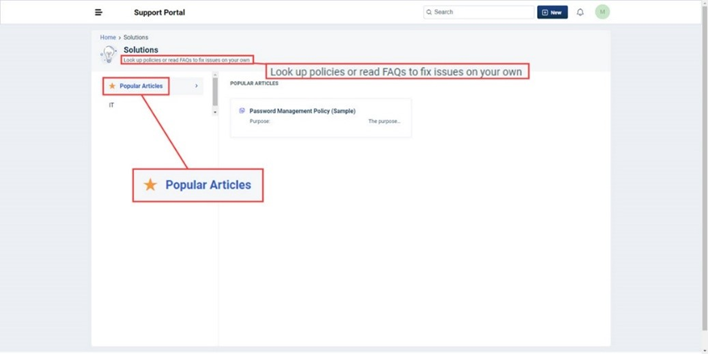
This is a work in progress where knowledge articles and FAQ’s will be added to assist customers with potential fixes to issues negating the need for a support ticket.
Tickets
This offers a detailed view of tickets using multiple filters as described below.
Tickets is the next menu item:
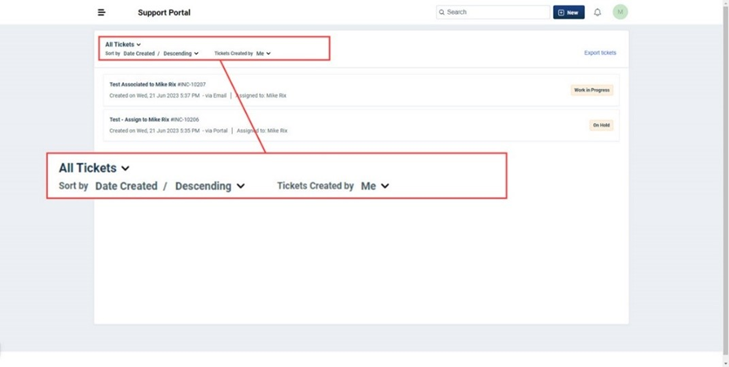
This shows all tickets that have been raised, the view can be filtered by clicking on all tickets and using the drop-down menu to choose the view.

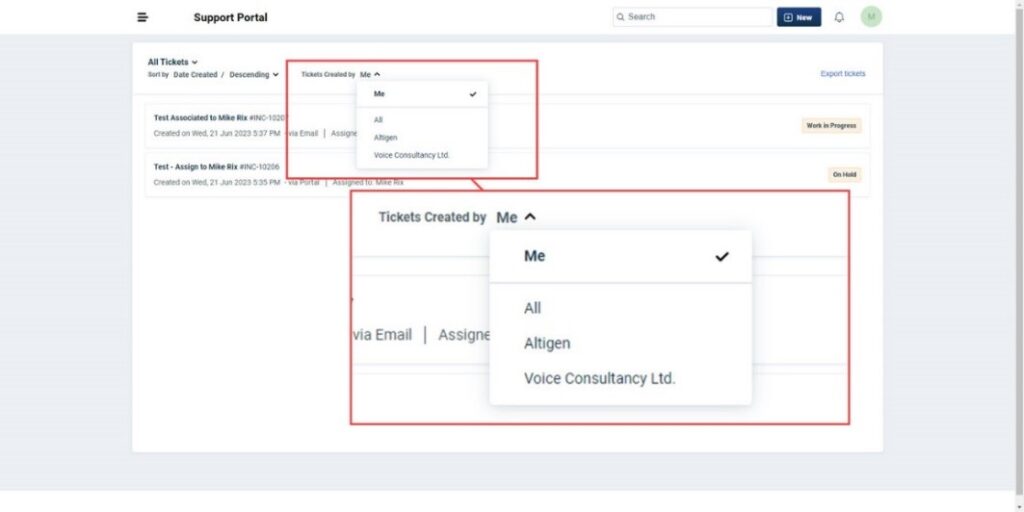
It is also possible to filter the view to tickets raised just by the user or by the company:
Tickets can be exported by clicking on the Export tickets button to the top right of the screen:

This will open a window giving the options of the export:
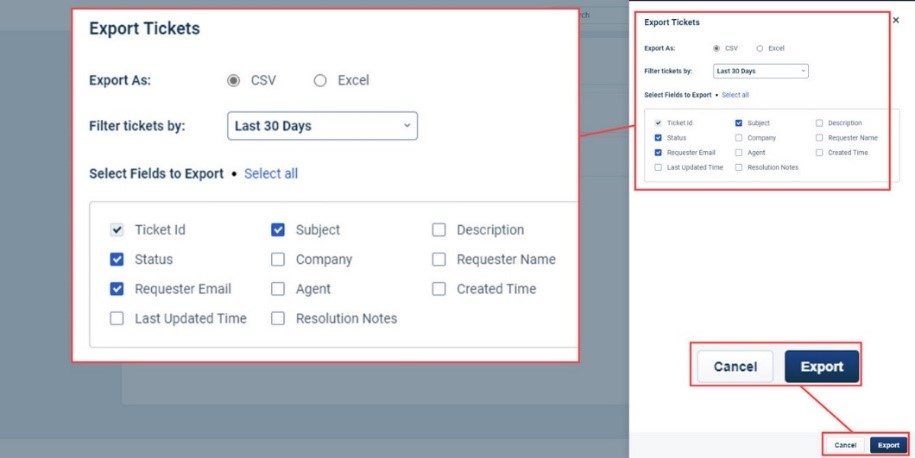
The file can be exported as a CSV or Excel.
Filter the date selection using the drop-down options:
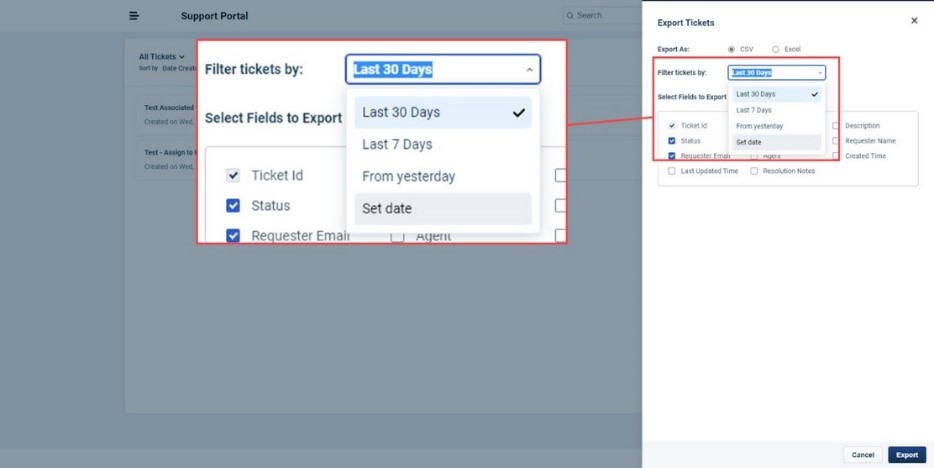
Now select the fields that are required, there is a select all button that will speed up the process if all are required. After this is set click Export.
The ticket data will be sent by email.
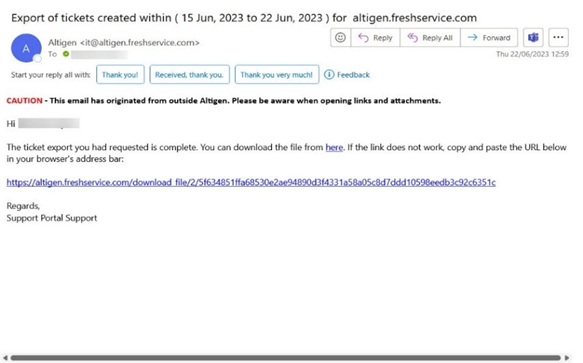
Clicking the link will start the download, once completed click the download to open the exported file:
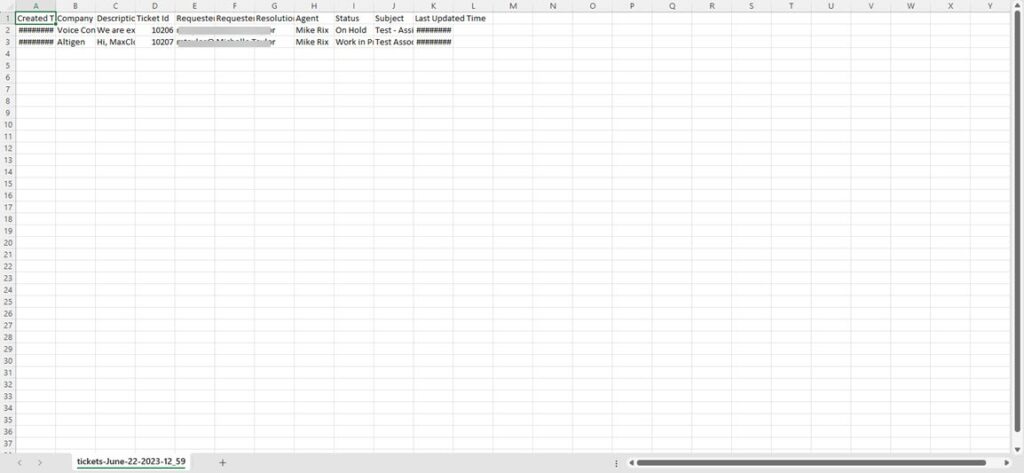
(Above is an example of what will show on an export to Excel).
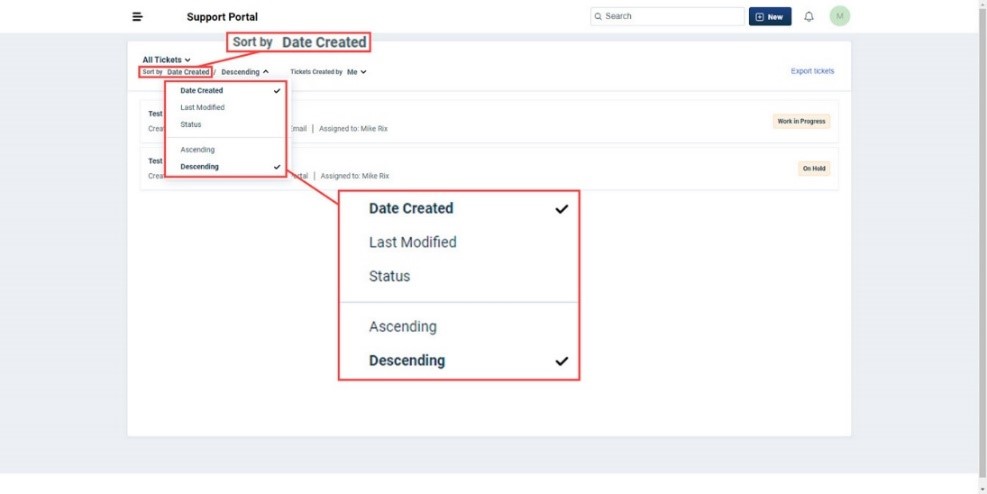
There is also an option to sort tickets by Date Created – Last Modified and Status. These can be viewed in either ascending or descending order:
Notifications
Clicking on the bell icon opens a window showing any notifications that have been received:
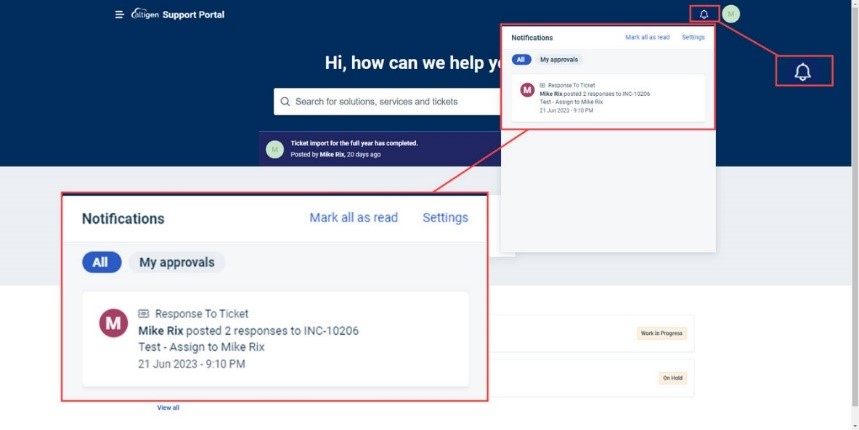
A number in a red circle will indicate a new notification. The number corresponds to the number of unread notifications.
It is simple to mark all as read using the button to the right of Notifications.
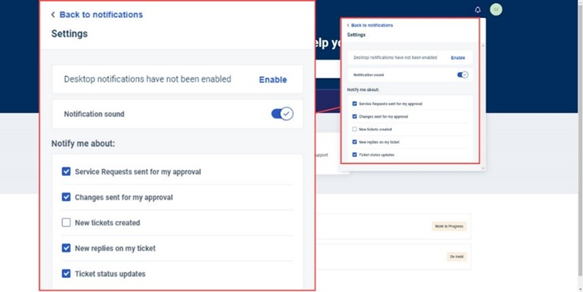
The settings menu contains the following options:
- Desktop Notifications – (these may be blocked depending on settings)
- Notification Sound – Toggle on or off the option to be notified by sound when a notification is received.
Next is the section to choose what notifications should be sent, the options are:
- Service Requests Sent For My Approval – If any software is requested the user will receive a notification requesting approval.
- Changes Sent For My Approval – A notification for any changes that have been requested.
- New Tickets Created – Notify if any new tickets are created.
- New Replies On My Ticket – Notify if the ticket has a reply.
- Ticket Status Updates – Notify when the status of a ticket is updated.
Reporting An Issue
Reporting an issue within Freshservice is very simple. On the home page there is a box that says Report an Issue:
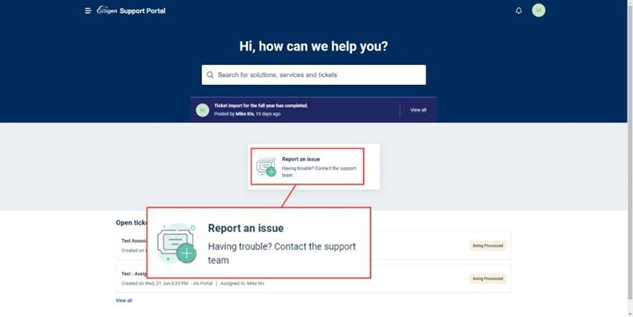
Click on this to create a new ticket. A new window will open showing the following:
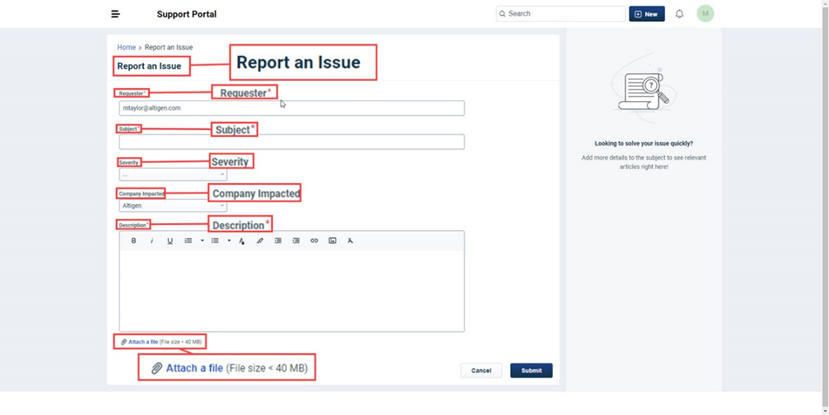
The fields included are:
- Requester* – The email of the person raising the ticket will be shown here.
- Subject* – A title description of the issue should be added here.
- Severity – Level of impact the issue is causing.
- Company Impacted – This dropdown contains all companies that are available to the user for tickets to be raised.
- Description* – This is where a detailed description of any issue should be typed.
- Attach A File – An option to attach a file showing any errors or issues.
**Below this though not show on the above screen capture is, +Associate Assets. If any assets have been added to the system and the issue relates to said assets, they will appear in the window that opens to the right of the screen when clicked.
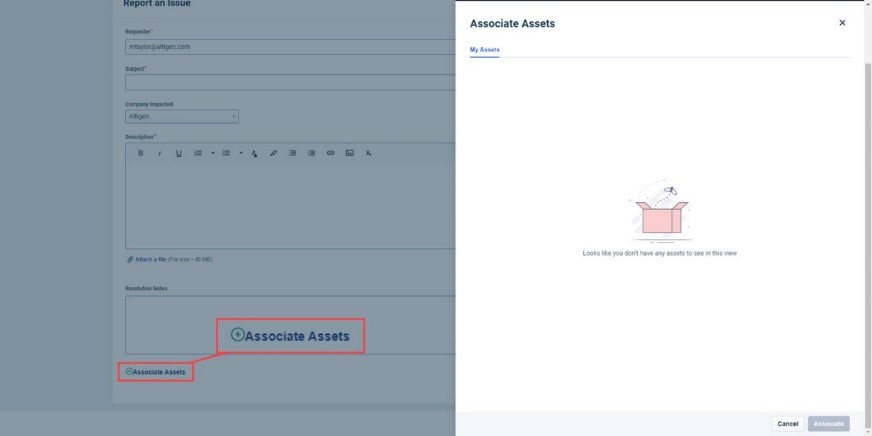
Once the information has been completed click on Submit to the bottom right of the screen.
NOTE: Fields marked with * are mandatory and must be completed for a ticket to be submitted.
** This feature will be coming soon.
Emailing A Ticket
It is possible to submit a ticket by email, the email address is: it@altigen.freshservice.com
When emailing in a ticket it is important to provide as much information as you possibly can. When the team review the tickets, it can be time consuming if they must constantly go back to customers to gather basic information.
Use the subject field to provide the customer’s name and a brief description of the issue.
Withing the body of the email again provide the customer’s name, a contact number and name of contact. Following this should be the information on the issue. Please provide as much information as possible including the impact and volume of impact.
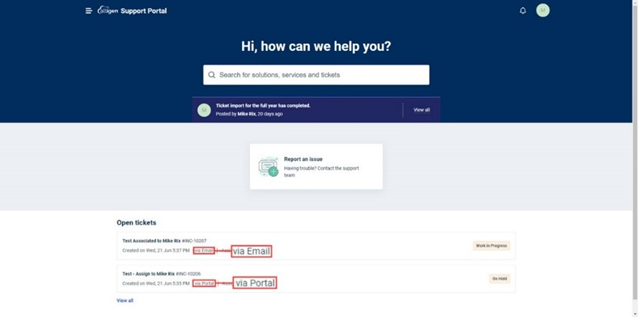
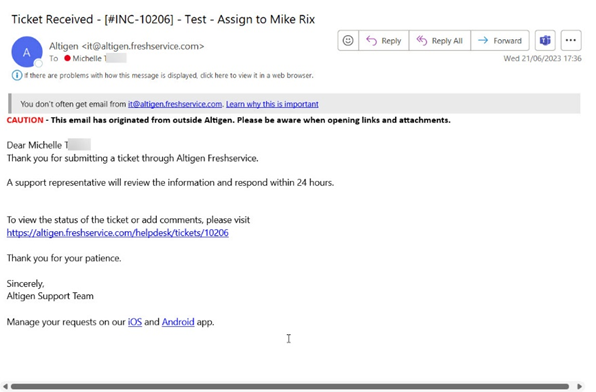
Once this has been submitted, an email will be received by the user to confirm that the email has been received and a ticket created. Each ticket contains the method of communication in the creation line:
Below is an example of an email that will be sent when you raise a ticket via email:
Responding To An Open Ticket
When a ticket is open it can be used to gather more information, the support team may reply asking for further information. Or a customer can open the ticket by clicking on it and send a message using the ‘Your Reply’ section.
Click on a ticket, this will open the information.
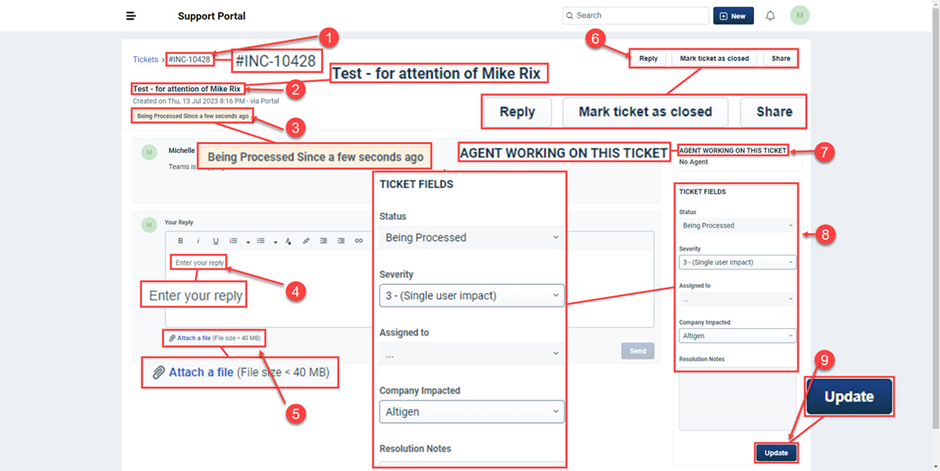
- Ticket Number – Displaying the number of the ticket being viewed.
- Subject – This shows the subject that was input at ticket creation.
- Status – This section will show the status of the ticket being viewed.
- Reply Field – Use this section to send any questions on this ticket. Use the Send button below this to send the reply.
- Attach A File – If any files need to be sent, they can be added here.
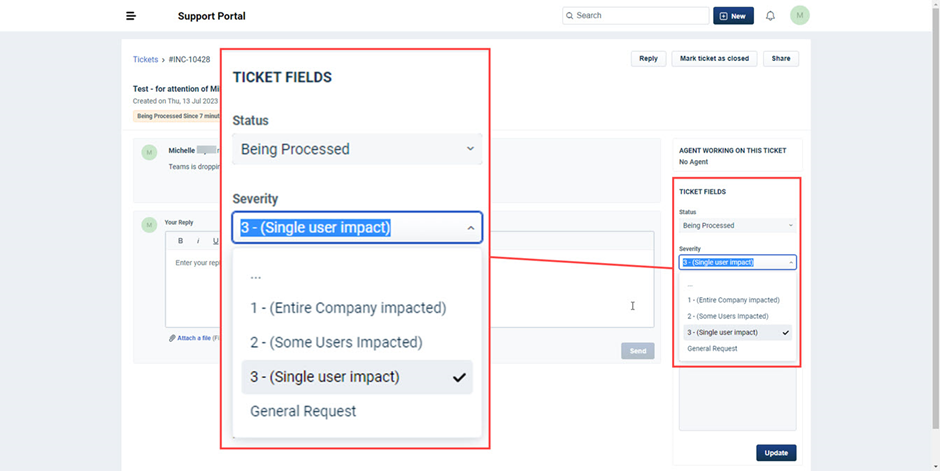
- Option Buttons – These include, Reply, Mark Ticket As Closed and Share.
- Agent Working On Ticket – The name of the person who is dealing with the ticket will be shown here.
- Ticket Fields – Shows status, Impact and company impacted.
- Update – Use to update the impact or company affected.
The ticket fields section has a drop-down for adding an impact, these are:
- (Entire Company Impacted)
- (Single Workgroup Impacted)
- (Single User Impacted or General Request)
- General Request
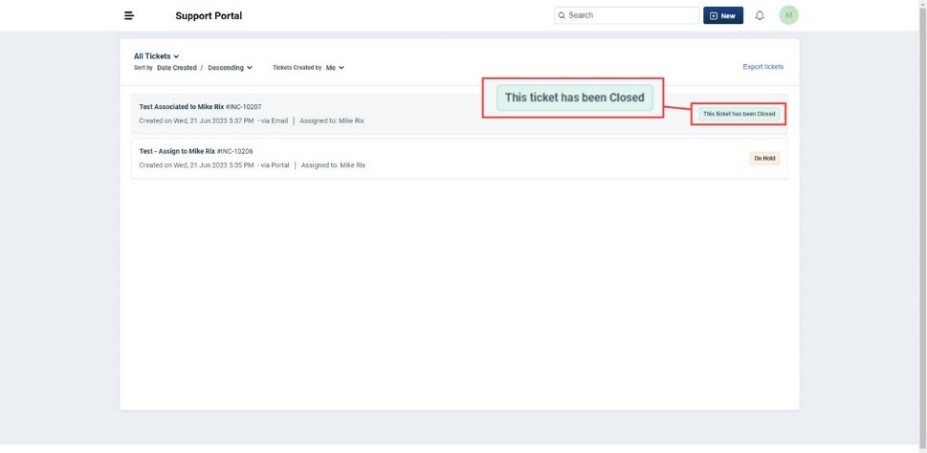
Resolved Ticket
When a ticket is closed the customer will receive an email. The status of the ticket will also change to closed:
Below shows an example of the email that will be sent when a ticket has been closed:
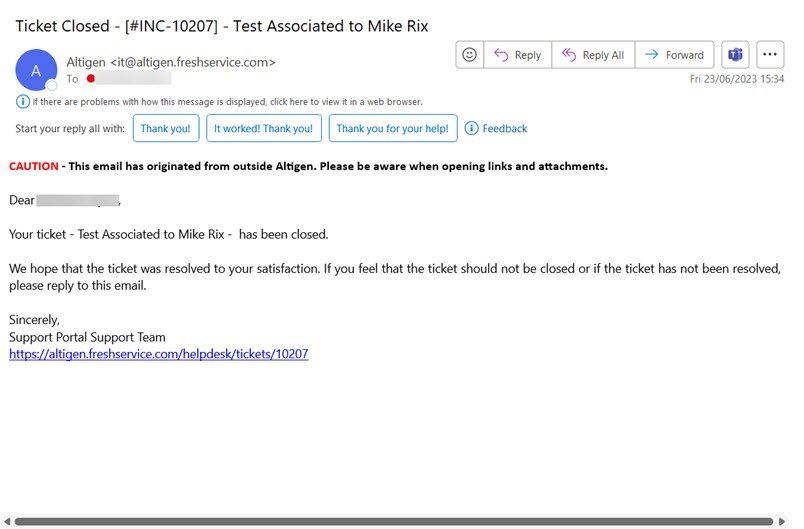
It is still possible to send a message over on a closed ticket, just click on it from the list then as described above use the ‘Your Reply’ section to send over a message.
General Settings
Within the home screen there is an avatar to the top right side of the screen. Clicking on this opens a menu containing:
- Edit Profile – Click to edit profile.
- Announcements – Click to view any announcements.
- Sign Out – Click to sign out of the portal.
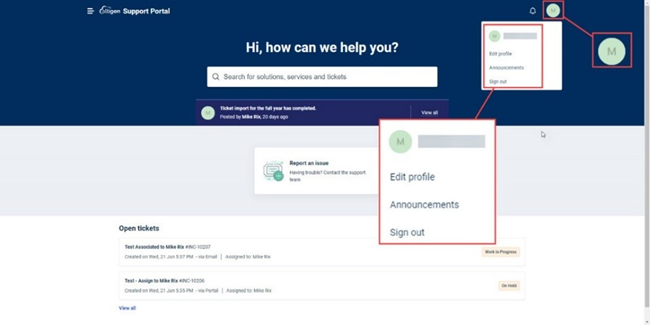
The below screen capture shows the Avatar with the menu as it appears when clicked:
Clicking on edit profile opens a window showing the information that has been input. This can be edited in this view.
To the left of the screen is the users name and time zone, below this is language then the option to modify personal information or delegate approvals:
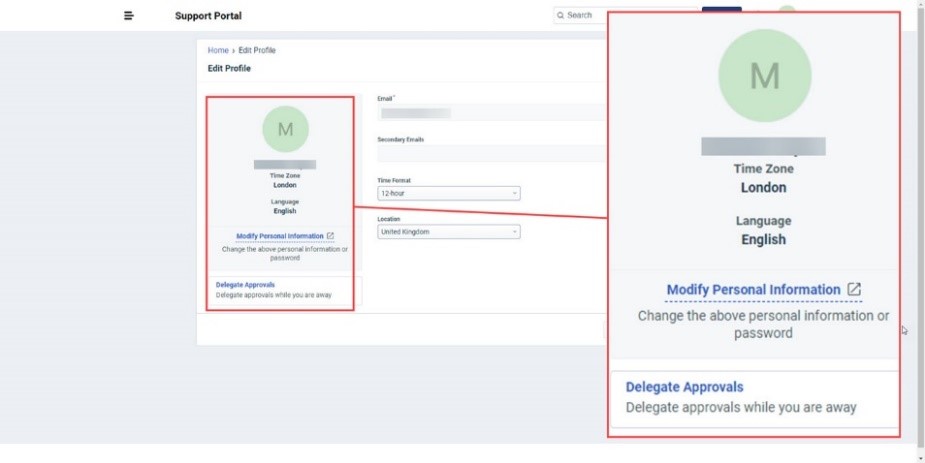
To the right of this are the editable options, these are:
- Secondary Email
- Time Format
- Location
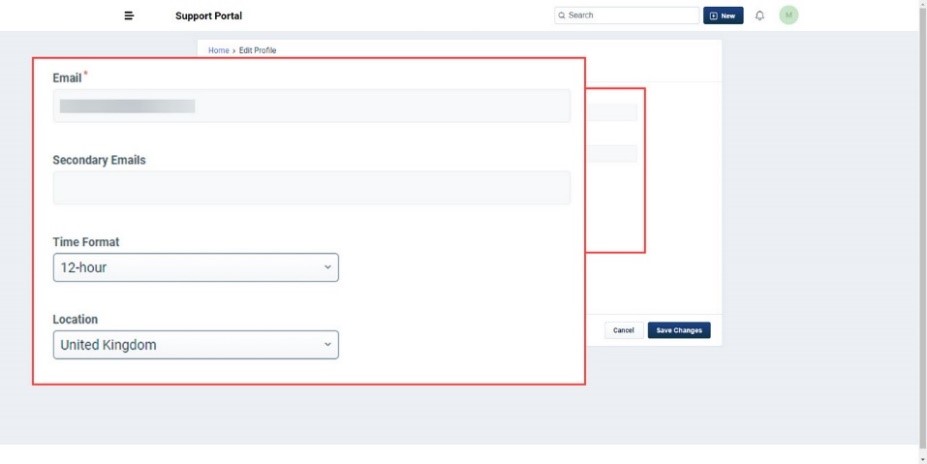
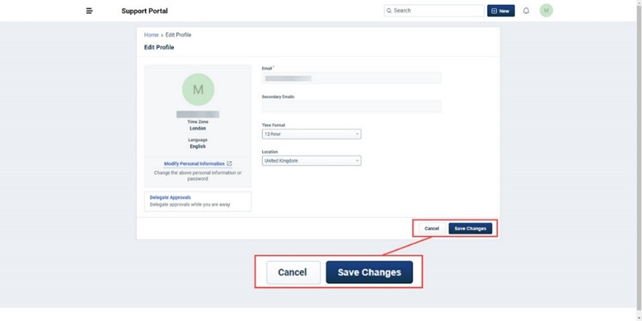
If any edits are made in here, remember to click on save changes to implement these:
Modify Personal Information
Clicking on modify personal information opens a new tab with the user’s profile information:
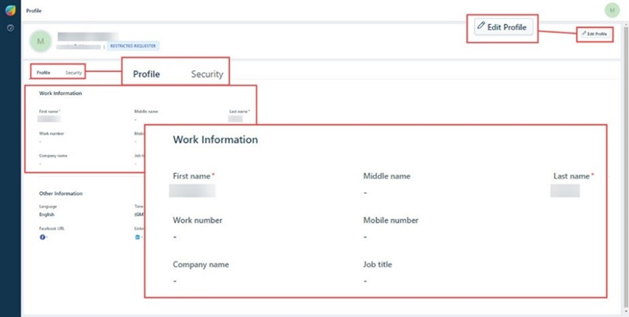
To edit any of the available information here click on Edit profile in the top right. Now the editable fields will be in text box format. Click on any to update the information:
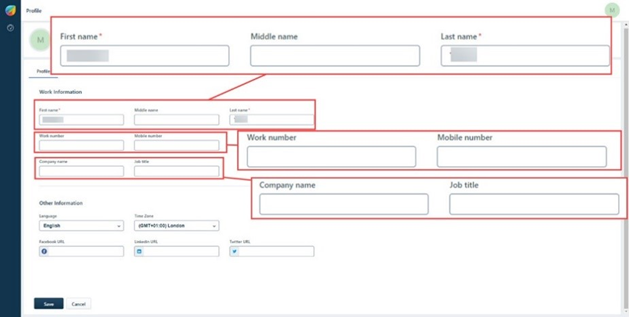
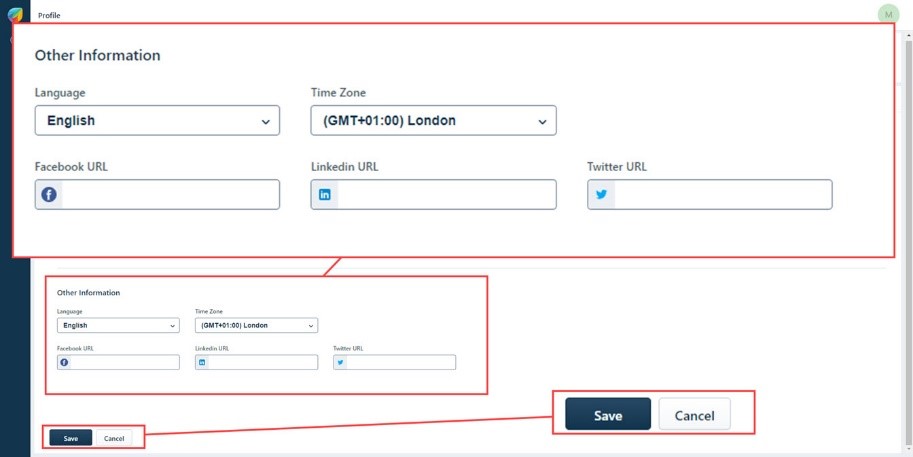
Once finished click on save to implement the changes made.
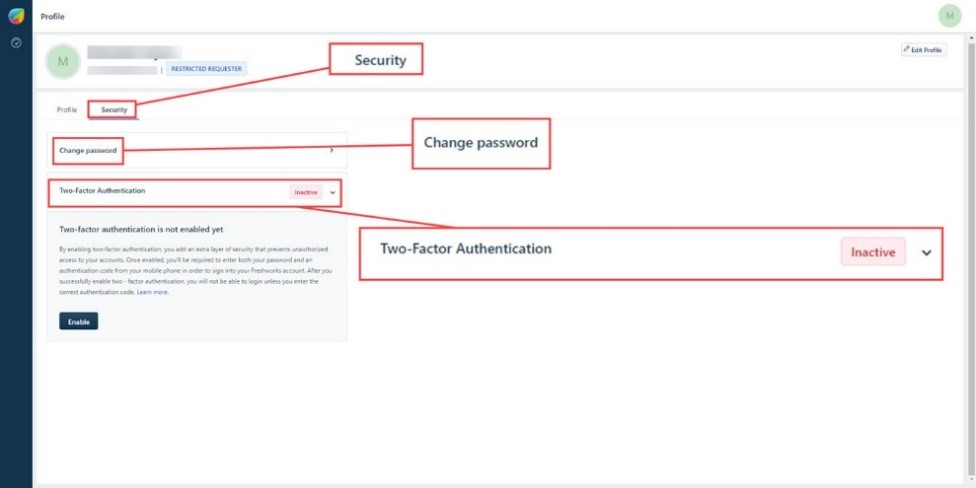
Security
Under the profile settings there is also a Security option. Clicking on this opens the options to change the password and add Two-factor Authentication to the account:
Clicking the arrow next to change password opens the password reset page:
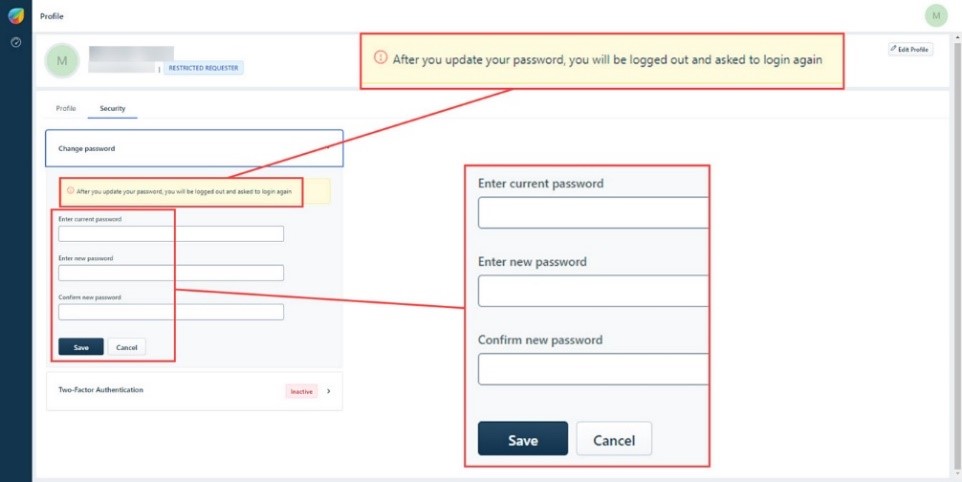
This requires the current password then a new password to be typed in and confirmed below. Once done click on Save.
NOTE: There is a warning here that lets a user know that doing this will log them out of the session and ask them to log in again using the newly created password.
Setting up the Two-Factor Authentication gives an extra level of security to the user as they will not only need a password but also an authentication code that will be sent to the mobile number provided when setting up this option. If this is something required, and assistance is needed in setting this up please let us know.
Delegate Approvals
Within this section (Under profile) is the ability to delegate access for approvals, this would be used to enable another staff member to act on behalf of the user if they are out of the office.
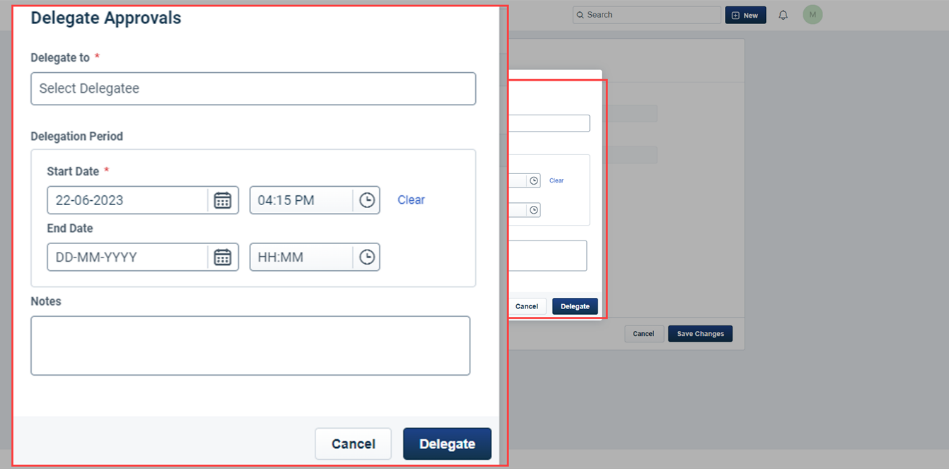
Begin typing in the name of the person who the access will be delegated to, a drop down of available options will appear. Select the person from the list by clicking on their name.
Now choose a start date and time for this to take place. Clicking on the calendar icon next to the date opens a calendar view. The clock icon opens a drop down of time shown in 15-minute intervals.
Add the date that this permission will end along with the time. Using the same process as above.
Add any notes then click on Delegate to make the change.
SLAs
The SLAs that are used for tickets are as follows:
| Priority | Respond Within | Resolve Within | Operational Hours |
| 1. Entire Company Impacted | 1 Hour | 4 Hours | Business Hours |
| 2. Single Workgroup Impacted | 4 Hours | 12 Hours | Business Hours |
| 3. Single User Impacted | 8 Hours | 24 Hours | Business Hours |
| 4. General Request | 24 Hours | 48 Hours | Business Hours |