Overview and Purpose
CoreAttendant Administrator (CAA) is used to manage Operator workgroups and CoreAttendant settings by the assigned administrator.
This guide will provide information for the administrator to set up and manage workgroups and settings for CoreAttendant based on business needs and requirements.
CAA View
The Main View of CAA is shown below.
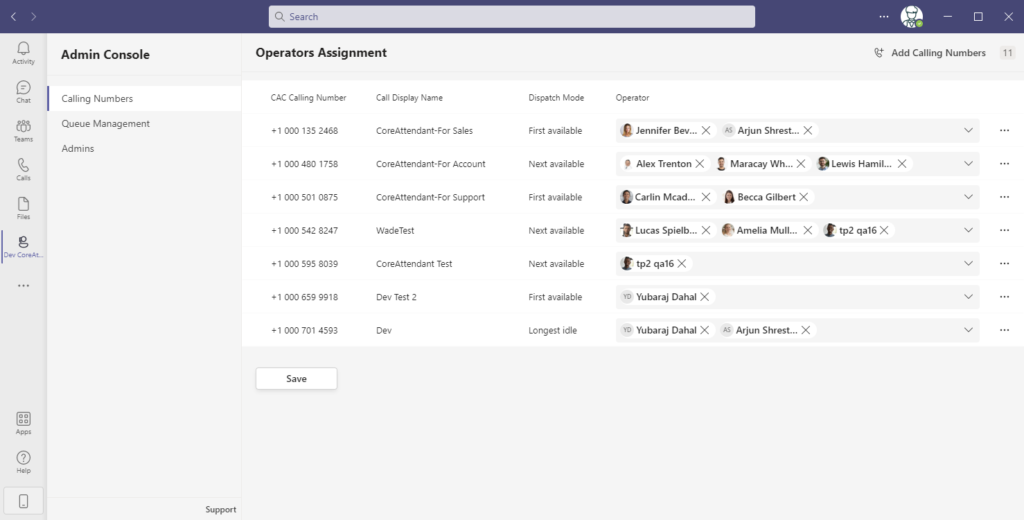
- CA Calling Number
- Call Display Name
- Dispatch Mode
- Operator Groups
- Add Calling Numbers
- Number of Operators Assigned Across all Groups
- Queue & Admins
Add Calling Numbers and Create Operator Workgroups
Calling numbers and operator workgroups are created based on inbound call management requirements that are defined within the workgroup. Once a calling number and workgroup are created, program configuration is required within a company’s tenant Microsoft Teams Call Settings.
- Start in the Calling Numbers View
- Click Add Calling Numbers
- Pop-up will include CAA generated calling number with an empty field to enter Name of Operator Group
* The calling number is not an actual number but will be needed for setup in tenant Microsoft Teams Call settings.
- Insert a New Row allows for additional calling number groups to be created

- Additional row appears with another CA generated calling number and a field for naming
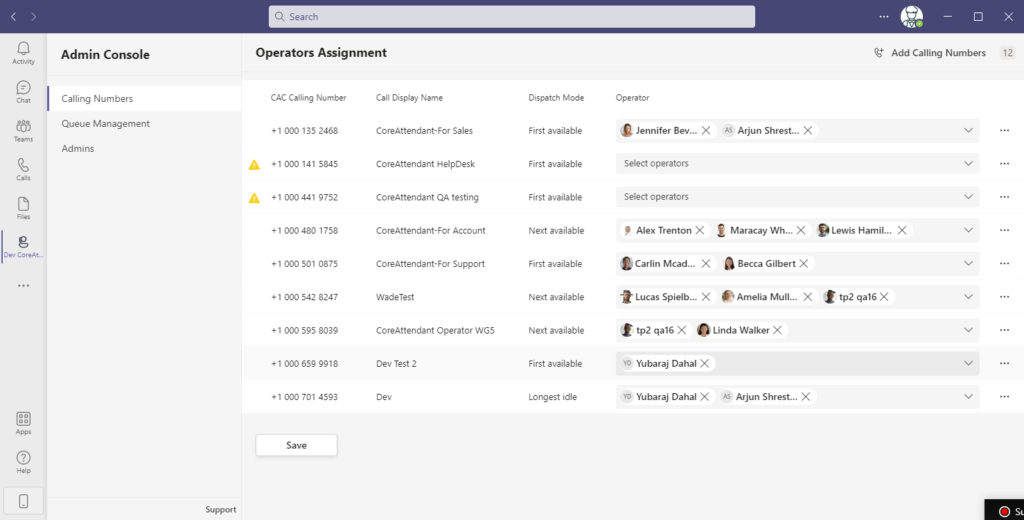
- Select Add All

- Once Add All has been selected, the Operator Assignment screen will show the new operator work groups.
- The yellow triangle is the identifier and alert to assign operators to the new groups.

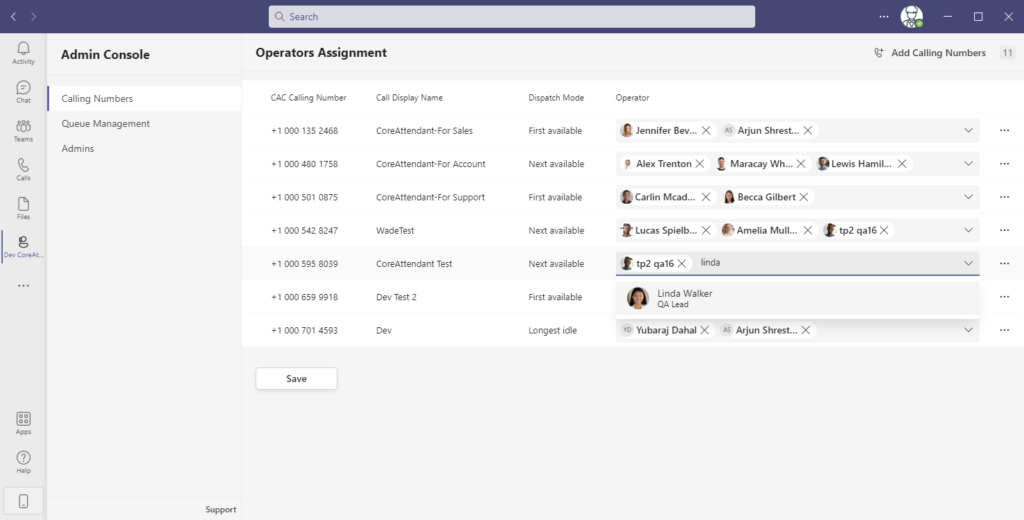
Assign Operators to Groups
Assigning users as an operator to an existing or new group is a quick process.
Important to Remember: The order in which users are added to an operator group is the order in which calls will be routed. The order of operators cannot be rearranged after they are added to a group. An operator can only be deleted or added to a group and not rearranged within a group.
- Click in the Operator field of the desired group to add a user as an operator
- Type in name of user(s)
- Select Save and Operator Assignment is Complete
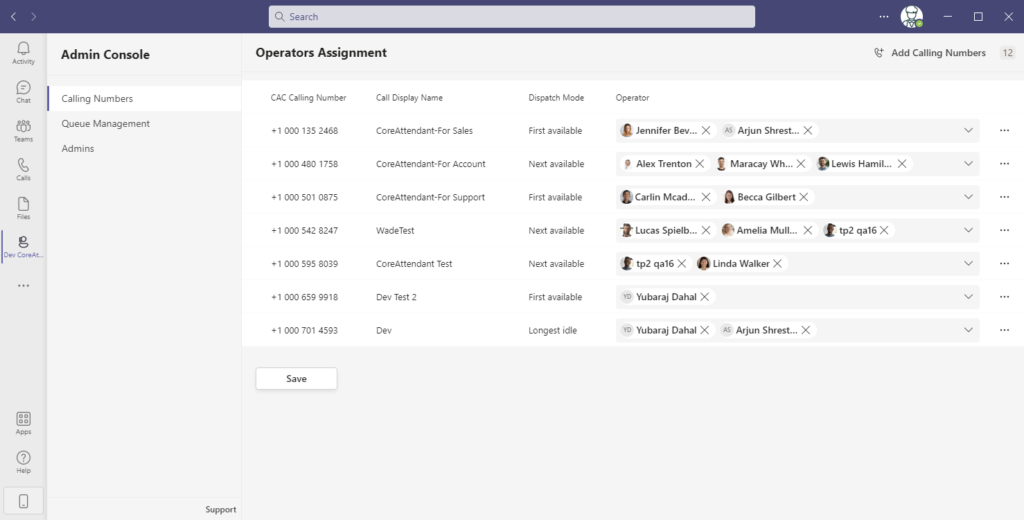
Remove Operators from Groups
To remove a user as an operator in a group is simple, click and save process.
- Find the specific group which needs the named user removed as an operator
- Click on the X at the end of the named user to remove
- Select Save *The user will then be removed as an operator for that specific group

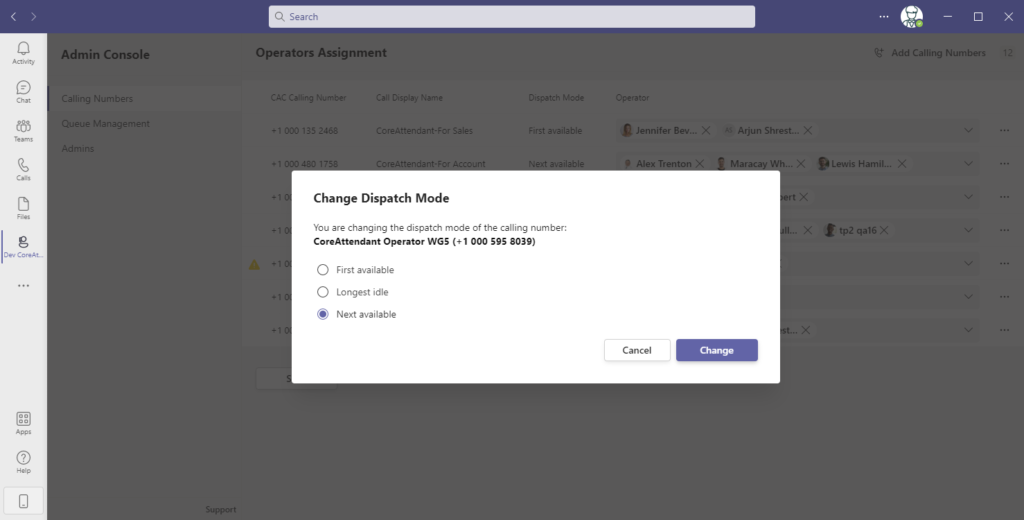
Dispatch Mode
Dispatch mode is set by Operator Group, not by individual operators. There are three dispatch options to determine the order in which a call is dispatched to an operator.
| First Available | First Operator listed in-group will always be routed the call when available. |
| Longest Idle | The operator in the group who has had the longest idle time will be routed the call. |
| Next Available | The next available operator will be routed the call in the order listed in the group. This mode will skip over those who already have taken a call even in available status. |
Reminder: The order in which users are added to an operator group is the order in which calls will be routed. The order of operators cannot be rearranged after they are added to a group. An operator can only be deleted or added to a group and not rearranged within a group.
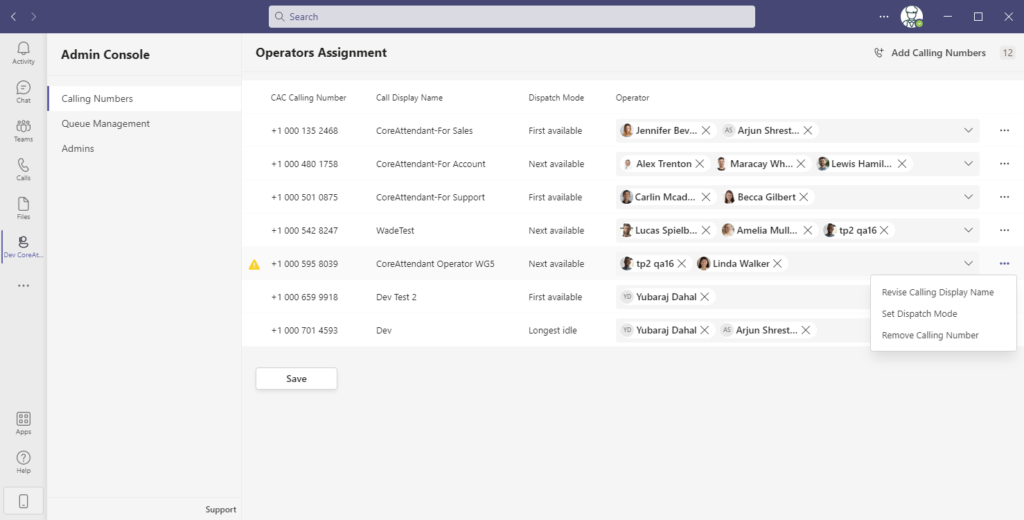
To set the dispatch mode, find the desired group in the list to change the dispatch mode and follow the steps.
- Click Meatball icon
- Select Set Dispatch Mode
- Select a Dispatch Mode
- Select Change and the Dispatch Mode is Updated
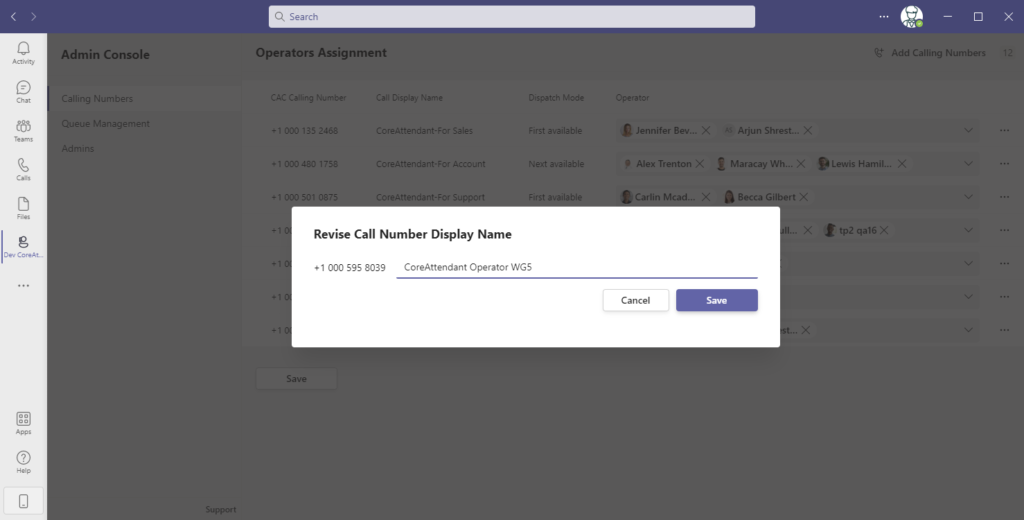
Revise Call Display Name
The Call Display Name may be revised as needed from the calling number view section.
Locate the calling name of the operator group and follow steps 1-4.
- Click Meatball icon belonging to the operator group with display name to revise
- Select Revise Calling Number Name
- Popup will show exisitng name and allow revision
- Save and Revision is complete
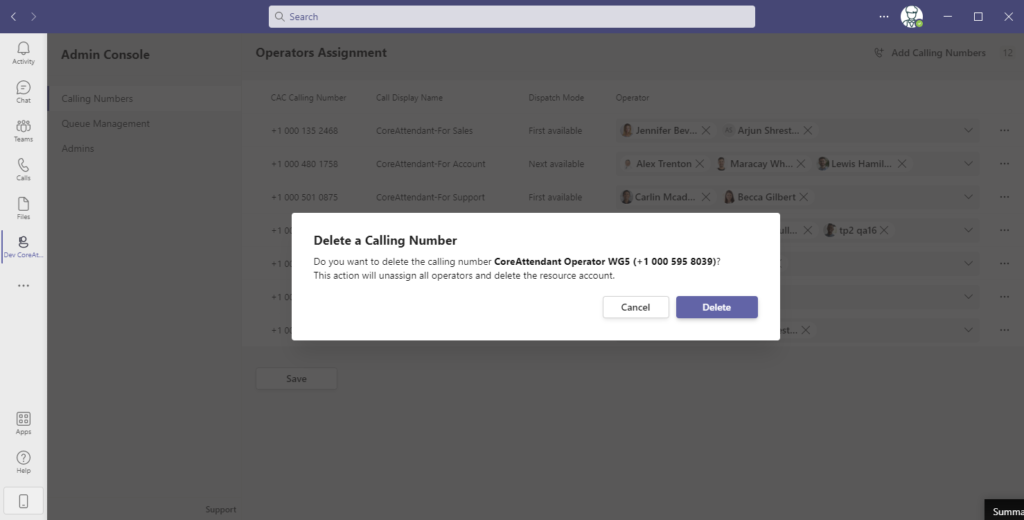
Remove Calling Number
When there is a need to remove a CAA assigned calling number this is easily done. An additional change will need to be initiated in the tenant Microsoft team call transfer settings so calls will no longer be routed to the removed CAA number. From the Calling Number, View, locate the operator group with the desired number to remove.
- Click meatball icon of the operator group listing the number to remove.
- Select remove calling number
- Delete Popup will show display name and call number to delete
- Select Delete to Complete
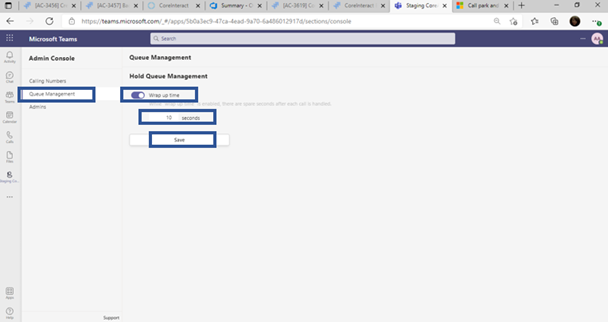
Queue Management – Wrap-Up Time
Set Wrap-up time is within Queue Management View. Wrap-up time is the post-call time delay between each call.
- Toggle to Turn on/off
- Type in Desired Time
- Save
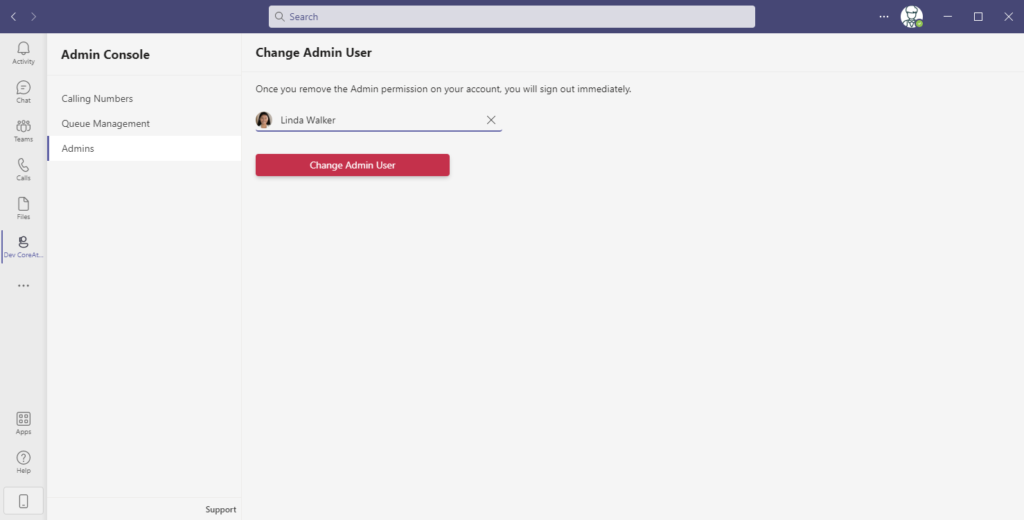
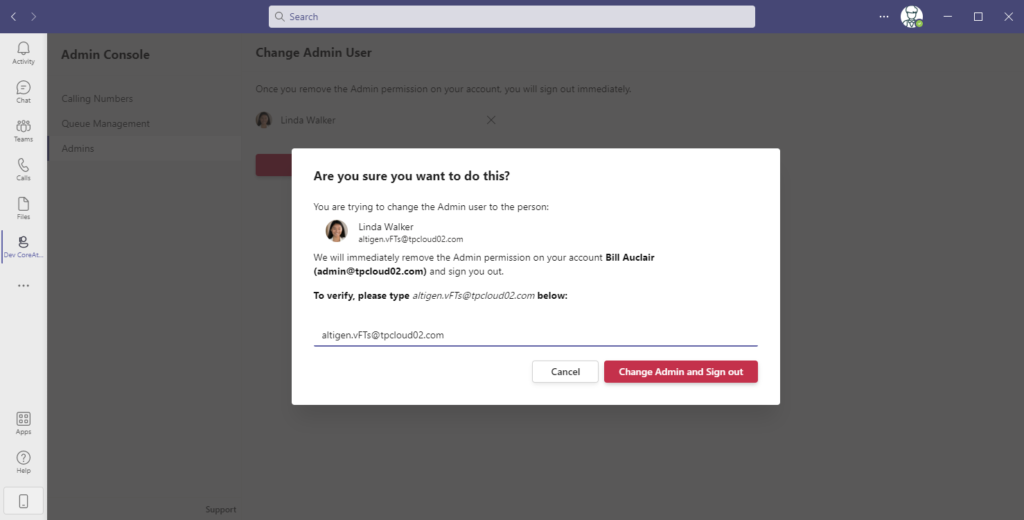
Change Administrator User
The Admins View is the location to change an Admin User
- Click Change Admin User
- Pop Up Appears with Verification Request Info Type & Confirm
- Select Change Admin & Sign Out to Complete